http://flash.tarotaro.org/blog/2009/07/12/mgo2/
2. To have an understanding about Markers please review "Marker File" in
http://www.mikkoh.com/blog/2008/12/05/flartoolkitflash-augmented-realitygetting-started/
Note:
You can use Paint Brush, Adobe Photshop, Gimp etc (any tool you are comfortable) to create the images/pattern for the markers.
Save the file as .jpg or .png with not greater than 278 X 278 pixel.
Then print a copy of the images/pattern.
Use the online marker generator at http://flash.tarotaro.org/blog/2009/07/12/mgo2/
to generate the Marker Pattern (.pat extension) file. (You can either use the printed copy and a Web cam to get the .pat file or use the saved .jpg or .png file to get the .pat file using the online Marker generator Program)
For good performance and easy tracking:
- Have the outer Black square about 80mm and the inner White Square about 40mm.
- If you use the online maker from the link given in item 1 above, choose 8X8 as the Marker Size.
Also if you want to use a stored .jpg or .png file with the image/pattern to make the Marker (.pat file) using the online maker program given in the URL of item 1 above, make sure the Pixel size is less than 278 X 278 for the program to fully select your Pattern as a Marker.
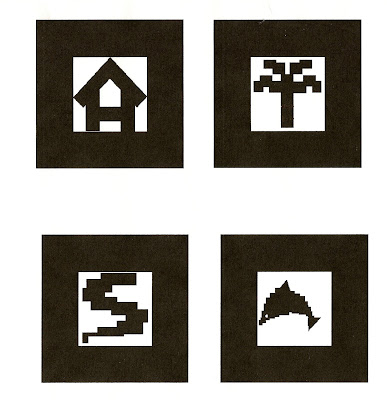
Example of the Marker images that our team member Esme created for the Project are shown here:

Note: The Picture shows 4 different Markers used in the Project to track 4 different 3D Objects.
-Suresh

No comments:
Post a Comment